What I Learned Making a Concrete Sink (And the Mistake That Nearly Ruined It)
Watch The Video Here
Concrete sinks look amazing in modern spaces, but they’re a lot harder to pull off than they look. I recently built one for my workshop bathroom remodel and you might think, "How hard could it be? Just pour the concrete and wait, right?”
Wrong.
Here are a few lessons I learned the hard way—and the one mistake that almost ruined the whole thing.
Lesson 1: Cheap Concrete Has Hidden Costs
I started with two $5 bags of Quikrete from Home Depot. To be fair, they worked. I tossed in some Portland cement, a plasticizer, and chopped fiberglass—just enough to make me feel like I knew what I was doing.
But once I demolded it? Pinholes. Everywhere. Cheap concrete has its downsides.
If I were to do it again, I’d use a professional mix like UltraCast from Fishstone. It’s more expensive, but it eliminates most of the post-processing. Totally worth it.
Lesson 2: Water Reducers Are Magic
I found this stuff at Home Depot called Flow Control. It's a plasticizer that thins your mix without adding extra water. One tiny package completely transformed the consistency of the concrete. Made it flow better, reduced air bubbles, and made the pour a lot easier to manage.
Pro tip: Add it gradually. It doesn’t take much.

Lesson 3: Measure Twice, Mix Once
I reused a melamine mold I had on hand, but forgot to double-check the volume. Big mistake. About 80% through pouring, I ran out of mix.
The sink still cured okay—but the bottom wasn’t fully filled, and I had to grind like crazy to get it flat. Measure your volume. Twice.
The Big Mistake: Sealing on Bare Concrete
After days of pouring, de-molding, grinding, and polishing, I got to the final step: sealing. I used a premium sealer called U-Seal from Fishstone—but here’s where I blew it.
In an attempt to make the shot look more interesting, I mixed a small batch of sealer directly on the unsealed concrete surface instead of a table or cloth. You can probably guess what happened next. It stained the surface before I even started sealing.
I tried to blend it out with four coats, but the spot never fully disappeared. I ended up wet polishing back down to 50 grit and resealing from scratch. It helped—but I still see it.
Don’t be like me. Mix your sealer somewhere else.

Final Thoughts
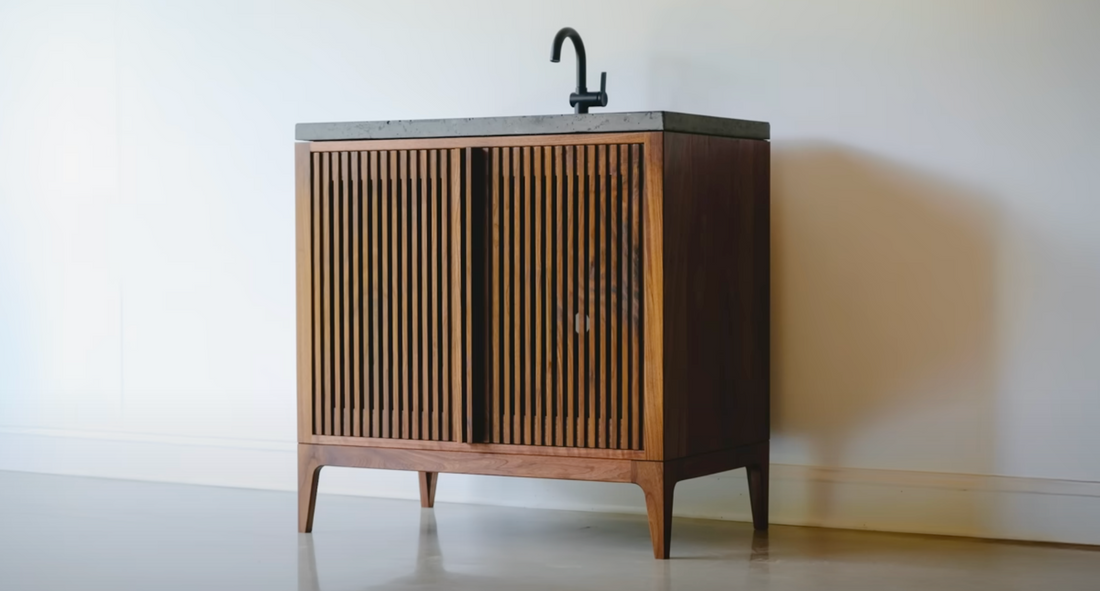
Despite all the mistakes, the sink turned out pretty great. The charcoal color matched the walnut vanity perfectly, and I learned a ton in the process.
If you’re thinking about making your own concrete sink, here's my advice:
-
Use the right mix
-
Don’t skip plasticizers
-
Build a mold & measure twice
-
And seal it properly—far away from the surface
Want to see the full build (and the moment I realized I messed up)? Watch the video here